Hey guys! Blogmas Day 2 is a DIY card and envelope. This was inspired by 2 Pinterest pins here and here!
Both of these are super easy and affordable. Most of the supplies you probably already own if you like to craft. The only thing people might have on hand is the washi tape. But if you go to your local craft store they most likely have them there. I get my tape from Michael's and they always have a coupon to use.
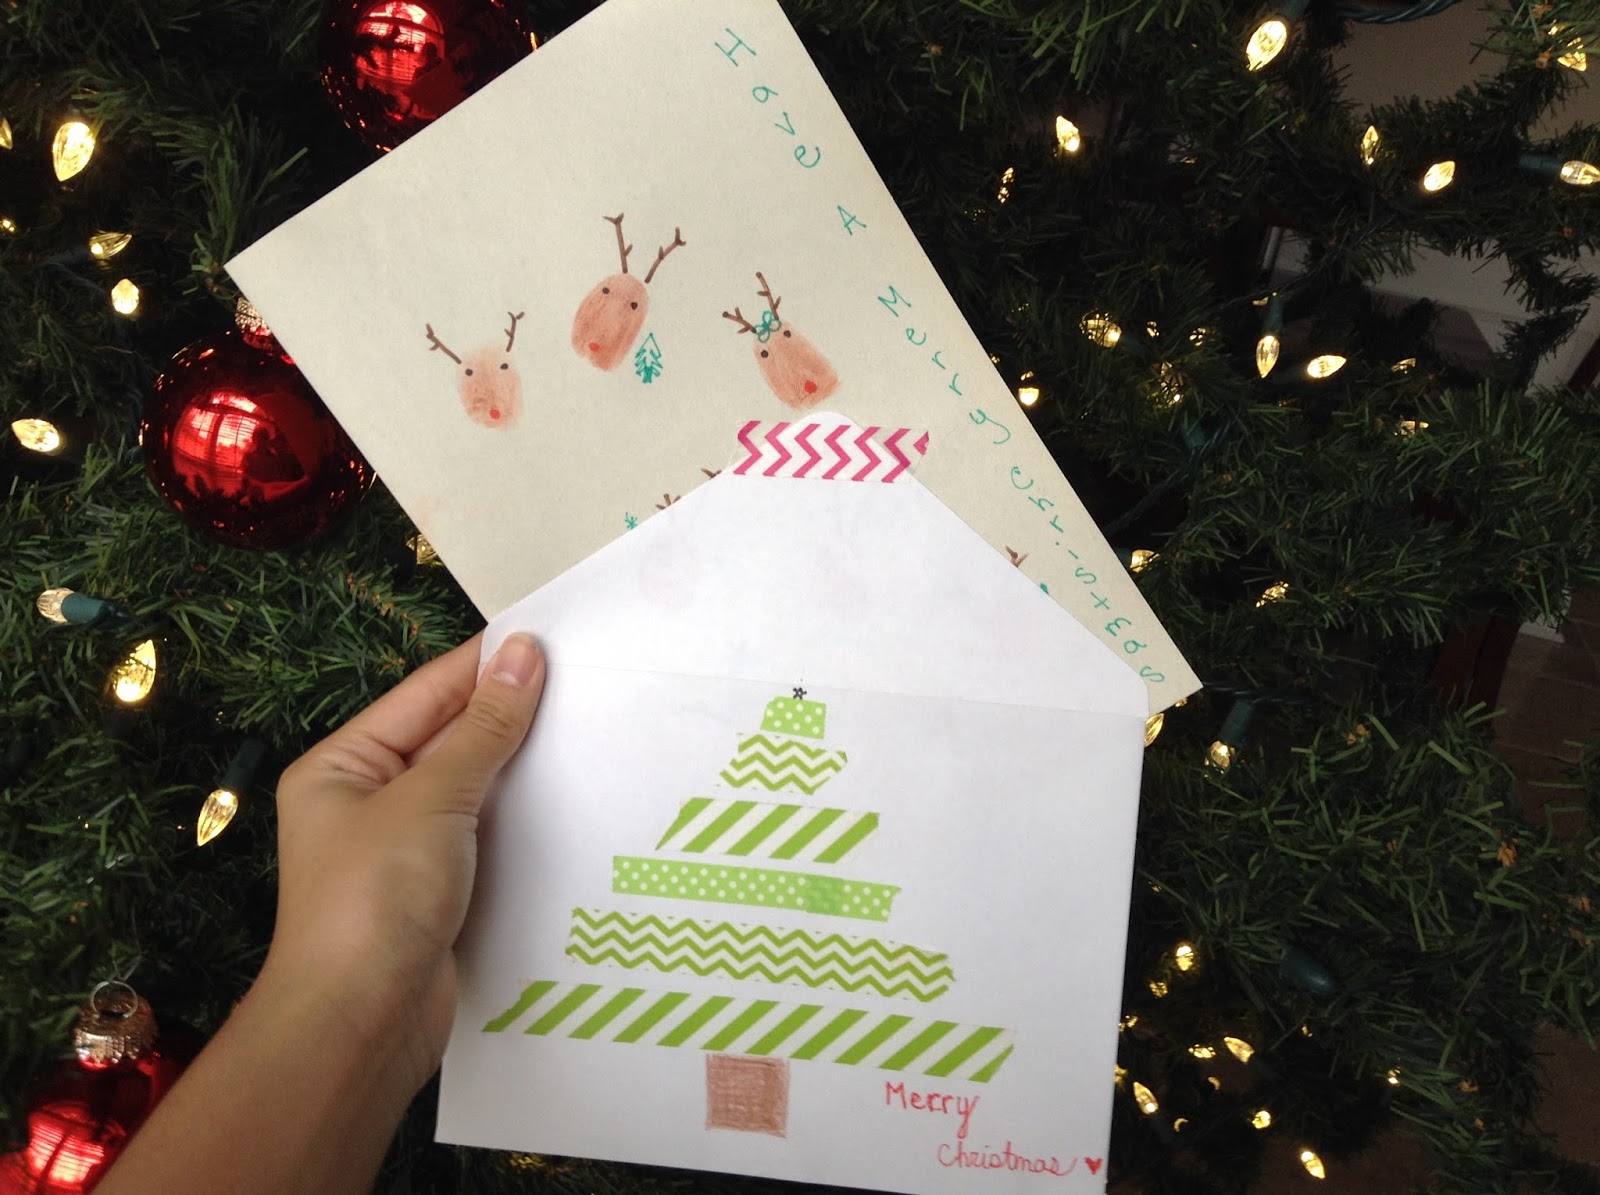
Day 2: DIY Christmas Card and Envelope
Fingerprint Reindeer Card
Supplies Needed:
- Paper (Ex: Card stock, printer paper, scrapbook paper)
- Thin Sharpies in the colors Red, Black, and Green
- Brown washable markers (You can also use a brown stamp pad but a marker can do the job)
- A finger (Any finger will do)
- Optional: Stickers, washi tape or any other craft item
Note: make sure the marker or the ink pad is washable. You don't want the ink to stain your finger!
Directions:
Step 1) Fold your paper of your choice into a card form (Hot dog style)
Step 2) Take your washable marker or washable stamp pad and add ink to your finger
Step 3) Apply the ink to the card by pressing your finger from one end and roll your finger to the other side
Step 4) Repeat this as many times as you want (These will be the heads of the reindeer)
Step 5) Use your red sharpie and add noses to the reindeer
Step 6) Use the black sharpie and add the eyes
Step 7) Decorate your reindeer as you please. I used the green sharpie and added hats, bows, and snow
Step 8) Optional: if you choose to use extra craft supplies like washi tape, apply it where you like now
Step 9) Now your DONE
Washi Tape Tree Envelope
Supplies Needed:
- Blank envelopes
- Different green colored washi tape
- Sharpies in the color yellow or black
- Brown marker or color pencil
- Optional: Red Washi tape
Direction:
Step 1) Take 1 of your washi tapes and start at the top of the envelope. Rip off or cut off a strip that is about 1 inch and place it at the top.
I chose to rip the tape to make it look less neat
Step 2) Repeat step 1 as many times as you want. Each tape you will make a little bigger than the last to make it look like stairs. You can refer to the picture to see what I am saying. You want to remember to save space at the bottom to draw your stump.
Step 3) Once your done with the tree leaves take a brown marker or color pencil and draw a stump. I went with a simple style one.
Step 4) Add any other items to your tree (Ex: lights, presents, a star)
Step 5) Optional: using your red washi tape flip the envelope over and add a strip to the back. This will be a closer for the envelop.
Crafting tip: I would also seal the card normally too, so if the washi tape comes of in the mail you don't lose anything important!
TA-DA! You have now completed your very own DIY card and envelope. Hopefully, if you create one you are able to send it to a person! Also, if you recreate one tag me on Instagram (@itsliddy) and on Twitter (@itsliddy)! I would love to see them. You can really get creative with these. Make sure to use Pinterest to get help with inspiration!
Make sure to come back for Blogmas Day 3! Love you!