Planner Crazy

Aug 28, 2016

     If you know me then you know that I am an organized freak. I may not be an extremer organizer, but higher than the average person.
I love planners! Anything and everything about them. I even follow planner accounts on Instagram. Pinterest is also a large portion of where I get my ideas for planner DIYS.
At the end of my 7th year at school, I immediately started working on my school supplies. My school supplies us with a school planner but they are so boring and uncreative. So, for me personally, I didn't want to use it. This is why I decided to make my own planner.
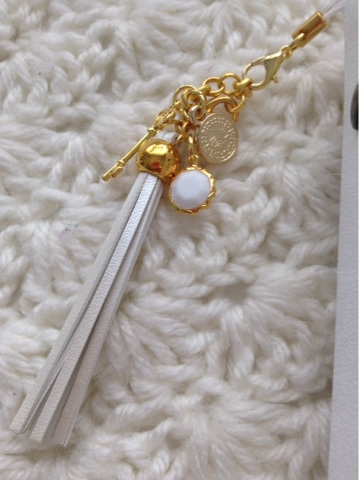
The theme of this planner is gold, pastel, and everything chic. ;) Here is a look at my school planner. Enjoy!


Most of the items I got were from Michaels and/or the Target Dollar Spot. The other 3rd I already had stored away. My vision for this planner was to (obviously) keep me organized but most importantly keep me inspired. If I have a writer's block I can open it up and find amazing quotes inside or little pictures with my friends in it. All of this was to help me out. My favorite thing about my planner is the personal touches I made to it. I like how I can store memories on a page for when I want to remember something forever. But for real... it did cost a lot of money. More expensive than some other planners but to me I see it as something I can use for a very long time. You couldn't find one of theses in the stores. The only way to find a great planner that fits your life is to DIY it! I know after showing my friends my planner they wanted to create their own! I can't see what they have come up with. 
I have a few questions for you to answer in the comments:

1. After seeing this would you want to make one yourself? 
If you do make a planner OR already have a DIY planner then tag me your photos on Instagram or Twitter. I would absolutely love to see it! 
2. What was your favorite thing about my planner and is there anything that you think would look good in my planner? 
Again, I would love to hear your suggestions! 

Shop this post:

Gold Woodgrain Scrapbook Paper By Recollections

This is currently out of stock online but may be in stock at your local craft store

Gold & Peach Cards Scrapbook Paper By Recollections™

This is produced by an Etsy account.  But most likely if you go to your local Target you can find it cheaper.
This is currently out of stock online but may be in stock at your local store 

Reader Survey | It's Liddy

Aug 27, 2016


Hi guys,
I have decided to write a survey to get to know my readers. I love knowing who is reading my content! My blog is almost 6 months old and I think its time to see if I can improve upon something.

This survey will help me know what my readers think about my blog. Please make sure to answer ALL questions with your full honesty. If you have questions leave them in the comments and I will answer them.

Love you all so much and if you fill this out it will help me out a lot!


(Hint* Make sure to scroll all the way down to submit to me)


DIY Agate Inspired Coaster

Aug 16, 2016

I have recently been scrolling through my Pinterest and have come across these agate coasters. I know they can be really expensive to buy so I decided to DIY them! If you like these coasters and want to find out how to make them keep on reading!


The Supplies: 
Acrylic rolling pin
Different colors of polymer (oven baked) clay! I will give you more information about this further down in the blog post.
Gold craft paint
Small tipped paint brush
Safe oven tray to bake the coasters in

The special supply that will make your coaster look more realistic to an actual agate rock slate is translucent polymer clay! This can be found at your local craft store. For me, I have Michael's. This is an important supply if you want to make yours look realistic. If you prefer not to use it that will be fine! 

For the polymer clay, I chose clay that was in my color scheme. I used a few different colors, mixing them to create more colors, too. You can have tons of colors or just stick to two. It's really your chose. I also added some fine glitter to some of the balls to make them more sparkly. 

Step 1:

Start to form your different groups of clay. I decided I wanted to create three so I spit my clay balls into three piles.

Step 2:

Roll your clay balls into long fat strips. Squish them lightly together like shown below.

Step 3:

Start to twist your fat logs together and mix them.

Tip: After twisting the logs together bend the clay down and then ball the clay up again. Repeat until you like the color and mixture of the clay. Also, make sure not to completely blend the clay together. Most likely it will turn out to be an ugly color so try to only do this process 3-5 times.  

Step 4:

After you combine the clay together, roll the mixture together in one ball. Pick the side you would like to see on the front. For me, it was this really pretty chunk. 

Step 5: 

Take your rolling pin and flatten your ball BUT you need to only flatten it a little bit. You don't want it to be too thick or too thin. 
This is what mine turned out to be! 

Step 6:

Place all of your coasters in a safe oven pan. I am using a pie pan my dad lets me borrow. Also, make sure to line your pan with a sheet of non-stick parchment paper.

Step 7: 

Bake according to your clay package. If you are having trouble finding your clay instructions then check either the top of bottom of the plastic. It should be there somewhere! :) 

Step 8: 

Let your coasters cool for the whole time. Then take your gold paint and brush and start to paint the edge of your coasters. Use your small tip brush. That's why you didn't want a coaster that was too thick or thin. You will need a few coats. I believe I had about 4-5 coats, letting the paint dry fully before painting on the next coat. 

Step 9: (Optional)

If you want to go an extra step add a coat of protector to your coasters for a nice finish. This is also an important step if you want to use these as drink coasters. You don't want the water to ruin your work. I am using Sculpey gloss glaze specifically for polymer clay. I believe you can use Mod Podge if you have that. (I am not 100% sure so I will update this post when I find something)  

That's It! 


If you guys make this DIY project then tag me in a picture on Instagram or Twiter (@itsliddy)! I find these blog posts super fun to write! I hope you enjoyed. If you have any questions then don't forget to post a comment. I would love to read them! Love you all so much. 

 
FREE BLOGGER TEMPLATE BY DESIGNER BLOGS